
Great Resources for Beginner Stained Glass Artists
So you’ve found a beginner pattern you love, and you’re ready to get started - but you don’t know what you don’t know. How do you fill in the blanks? This article will help you find resources to build your skills as a stained glass artist - I’ve spent many years teaching myself stained glass with the help of both online and in-person training, and I figure I’m doing okay! I’m not going to teach you how to do stained glass here - rather, I’m going to point you to folks who do that, way better than I could, and I’ll make some recommendations for places to find great content and help.
LOCAL RESOURCES
In-Person Classes
One option, of course, is to try and find a local stained glass shop that offers in-person classes. The best way to find an up to date list of local retailers is to Google or Yelp “stained glass supply stores near me.” You’d be amazed how much you can learn, and how far you can go, with a few hours a week over the span of 6 or 8 weeks. However, this option is not for everyone, especially given that classes might not be available, or there may not be a shop near you - or hey, there might be a global pandemic or zombie apocalypse happening that year. So, let’s find some other options.
SOCIAL MEDIA RESOURCES
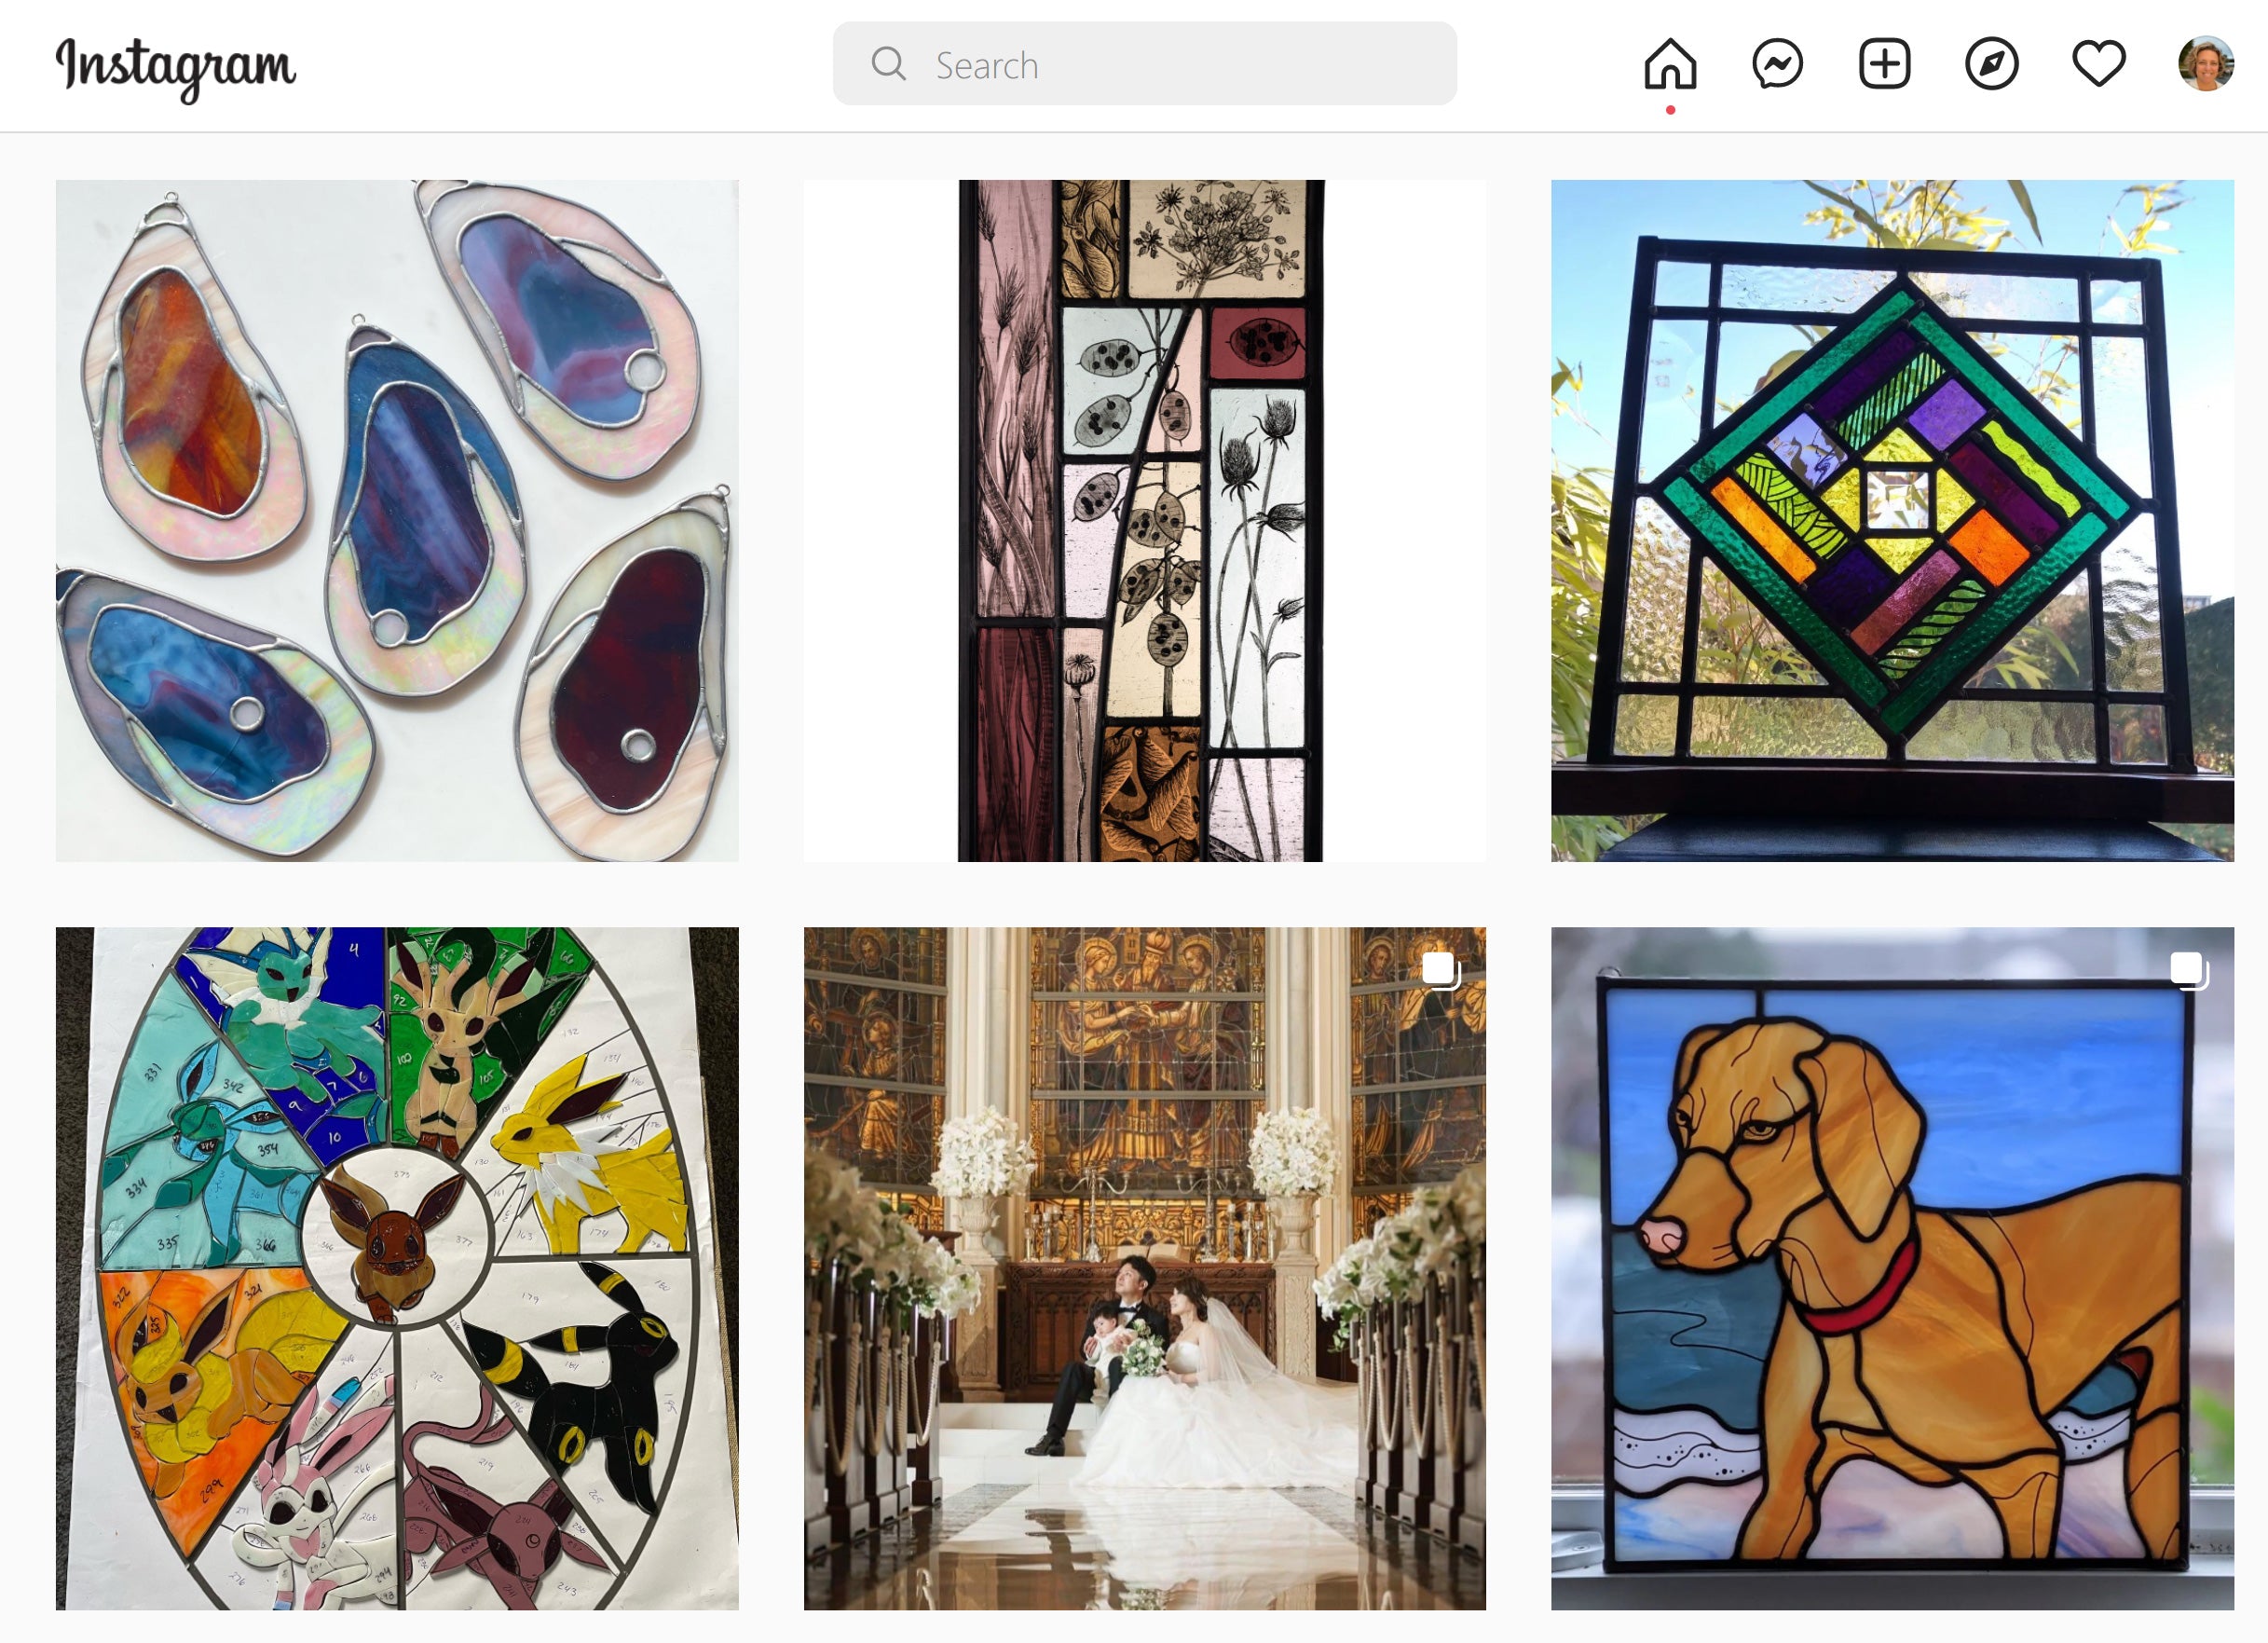
There are some pretty great stained glass communities on social media. First and foremost, Instagram has been a really great learning place for me. I search for hashtags like #stainedglass and #stainedglassartist, and then I follow the accounts whose work really speaks to me. That has led me to artists who, over time, sometimes share their tips and tricks, like @eringlassworks and @glimpseglass. I also found this list of 20 Stained Glass Artists to Follow on Instagram helpful in building a list of people whose work I enjoyed, then I'd see who they followed, too. Once you find an artist whose work you enjoy, be sure to scroll through all of their posts, and read them - sometimes they share some really great tips.
Facebook has several communities dedicated to Stained Glass - Stained Glass Addicts, Stained Glass Learners & Addicts, and Stained Glass Crafters, just to name a few. Use the search function in Facebook and search for stained glass, then filter the results by groups. At last count, dozens of groups came up, some more regional, some more dedicated to different kinds of art, others dedicated to BIPOC communities.
Last but not least, we cannot forget about Reddit, which has many subreddits dedicated to stained glass. Start with Stained Glass Reddit, then continue down any other Reddit rabbit holes you might find from there.
There is so much help out there - jump in!
ONLINE RESOURCES
Tools
First, you’ll need to make sure you have all the tools that a stained glass artist requires. (Full disclosure, I’m not selling anything or making anything off these recommendations.) I like this list at Stained Glass DIY - not only does it include links and a video, but it also has a helpful glossary of terms.
Cutting and Grinding Glass

Once you have your tools, you’ll want to watch some tutorials on how to cut your patterns out, trace them on to your glass, cut your glass, and grind it. For the pattern transfer, I found this video from Monkey See very clear and helpful. Delphi, one of the larger online glass supply retailers, has a helpful video on glass cutting. And this video from LadyBerz is a good review of the primary concepts of cutting out multiple pieces of glass from one sheet.
Copper Foiling
Once your glass is ground and fitting together, rinse and dry it and turn to your copper foil. I exclusively use Edco foil after much trial and error - I find it splits on curves the least and solders beautifully! In any case, here’s a really good article on copper foiling, detailing with an Xacto knife, and more.
There are a few things to remember with copper foiling - first, how thick is your glass, and how thick of a bead do you want with your solder? Most glass is 3mm thick and will use a 7/32" copper foil nicely, but you might want something thicker. Second, do you plan on using black patina, copper patina, or leaving the solder silver? If any of your glass is transparent, and you plan on using black patina, use black-backed foil; if you plan on using copper patina, use copper-backed foil. Finally, If your glass is transparent, be sure to overlap your foil so that it's a little thicker on the front of the piece than on the back - so that the tape on the back doesn't show through to the front. Just a nice pro tip.
Also, if your pieces didn't fit quite right without copper foil, the foil can make that more pronounced. Try and get that fit right *before* you put the tape on!
Fluxing & Soldering

And now for fluxing and soldering! I use Canfield Coppermate flux - there are multiple options out there, and everyone will have their favorite. There's no right or wrong option - just the one you like using best.
Colorado Glassworks has a very comprehensive article on fluxing and soldering, from start to finish, including important tips on safety - that is perhaps the most important component to integrate into your soldering from the very beginning!
The hardest thing to do when soldering, I believe, is to get a great, smooth bead on your work. If you want a really, really in-depth novella on soldering, this is it! It was made by the folks who create and sell Inland soldering irons. I myself use a Hakko adjustable temperature iron, which has been the gold standard for a while now. But this PDF has some really great tips.
If you're more of a video learner, check out this video on soldering, which also includes some good tips on reinforcing, too. The artist here uses a different form of solder (bars) than most of us will (rolls) but you'll get the idea.
Lead Caming
If you really want to finish off your piece, invest the time and money in lead caming. This stuff makes your pieces look so pretty and professional. You don't necessarily need it, though - here's an article to help you decide.
If you do decide to use it, the good news is, you don't have to break the bank to work with it - just invest in some good disposable gloves, a pair couple pairs of plyers, and some hobby came, and you can do what is detailed in this video. It's important, I think, to always stretch the came a bit before using it - it helps the came to be more workable when it's a bit taught and straight first.
You can level up to stronger and thicker cames as you get more advanced - this video shows a bit more on that. And, if you ever want to, you can get even more advanced and make stained glass windows that use only lead as the borders between the glass - instead of just copper foil. Another article for another time, I guess!
Hanging Loops

One of the trickiest parts of creating a piece of stained glass is understanding how to hang it. Many patterns will tell you to just add a hanging loop or two to the back of the piece, especially if you're going to border it with some lead came. While this can be a convenient way to do things, I have had several long-time stained glass artists tell me that they have done a multitude of repairs on pieces that eventually had the lead came sag over time because of this type of hanging technique. Lead is a soft metal, after all, and it does stretch - even when initially stretched for the framing work.
Each one of them recommends the same technique for most suncatchers - the one outlined on page 2 of this PDF from Delphi, Custom Wire hooks. Rather than just having a jump ring that is soldered on to the lead came or even on to a seam, this solution adds structure by continuing the wire from the jump ring down into a seam on the piece, adding increased strength to the hanging of the piece and dispersing the stress on the ring joint.
If you don't have a seam in a convenient spot, there are a couple of other options in that PDF that might be good to try.
Cleaning and Applying Patina

For cleaning, I have found two things that work really well to remove the flux: a paste made from 2 parts dishwashing liquid and one part baking soda, OR C.J.'s flux remover. I've also used Kwik-Clean, and while it can be useful while I'm still on the bench and need a quick cleaning of a piece and don't have a sink nearby, the first two mentioned have really improved the overall quality of patina later.
As for applying patina, LadyBerz's video here explains the steps. Patina can be tricky, and the really important step is to make sure that solder is extremely clean and open (porous) to the patina right before you begin! There are lots of tips and tricks people have to getting the patina as black as possible; I admit that some days for me are better than others and I'm not sure exactly why - I can be using the exact same steps, same roll of solder and same bottle of patina and sometimes it'll come out really black and other days sort of brown-ish. Some folks use magic erasers on the solder prior to patina, others use AAAA steel wool. I've used both and haven't found either to be the perfect solution. I've tried using Q-tips and toothbrushes as the applicator - same result. I've tried adding salt to the patina - hasn't made much difference.
You should experiment to keep seeing what works for you - when you're starting out, patina can really help to make your pieces look beautiful and pulled together, and it hides a multitude of soldering imperfections until you can really master soldering techniques!
Polishing/Waxing
Everyone seemingly has their favorite wax for polishing! From lemon Pledge to carnauba wax to actual stained glass polishing compound, there is no perfect answer here. This video is a quick and helpful guide to polishing/waxing. Note that the part on polishing starts at 5:10; where she says you can use a q-tip to get the dried wax out of the corners, some artists also use a soft-bristle brush to do the same over a larger area.
Hanging

Now it's time to hang your piece from the loops you added earlier! There are so many options here. Popular are jack chain, ladder chain, or box chain - generally you'll want something in the 16 to 18 gauge size for most suncatchers that are around 12" or less. Or you can use leather or leather-like cord, or velvet, yarn, or twine - the options are really endless here, as long as what you choose feels like it will support the weight of the piece.
And one more word on that - it's so, so tempting to use a suction cup to support your piece. And some small pieces, with just a few small pieces of glass and no came, can probably be okay on a suction cup. But most pieces of stained glass will be at risk on a suction cup, because of temperature variations that affect the glass and its ability to allow that cup to hold suction over time. When in doubt, hang from a nail or something else within the window. Or, consider hanging on a wall - glass does not always have to be in a window to be beautiful!
If you have to hang it in a window with a suction cup, your best bet is to ensure that the cup is rated extra heavy duty.
Next Steps
Hopefully you've found something helpful here.
For lots more tips on more advanced topics, Milly at Everything Stained Glass has lots of free content - articles and videos - in additions to paid pre-recorded mini courses for a reasonable rate.
A class I recently took at Domestika by Jarod Crews of Cellar Door Trades fame was also really fun - it's a fresh take on stained glass, and adds the more advanced technique of overlays (very close to my heart!).
Did I miss something great? Let me know!